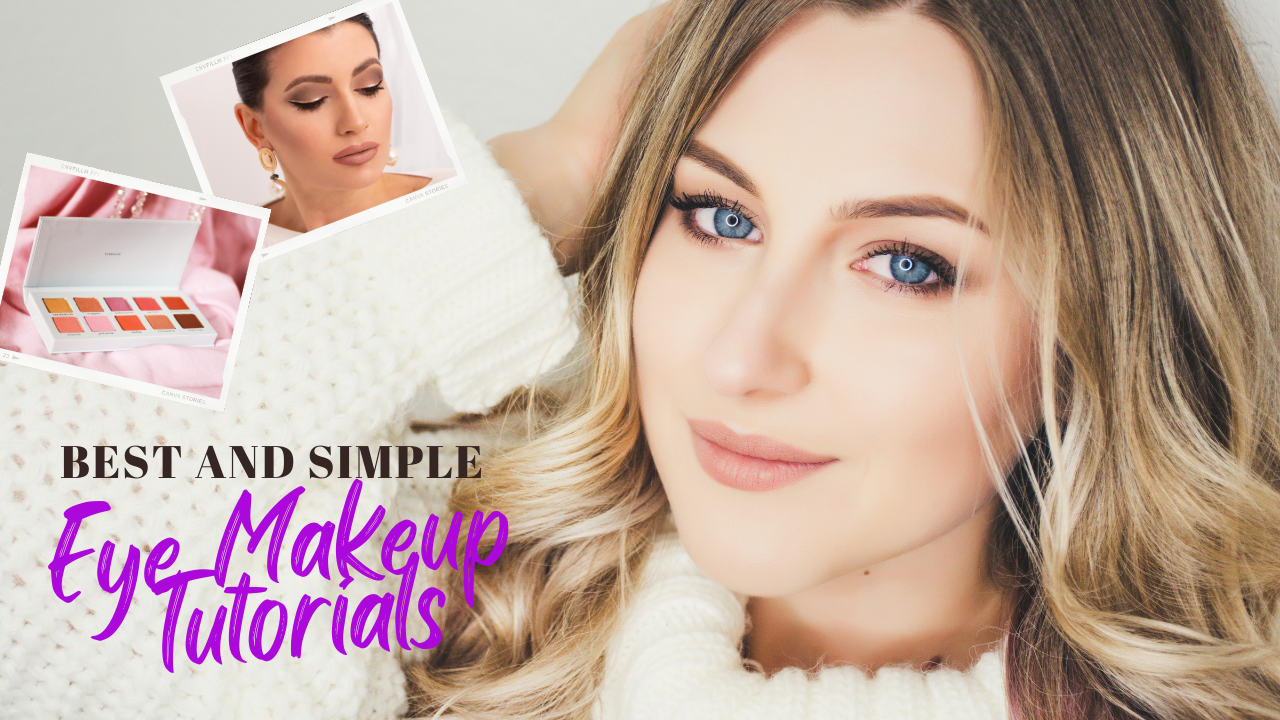
Eyes are considered as a major feature of the face which draws attention. No one can deny the fact that beautiful eye makeup add charm to your eyes and enhance one’s beauty. Eye makeup looks pretty in a way but not a cup of tea of every one. The biggest question is: Can you do it yourself? Don’t feel embarrass of searching on Google about eye makeup tutorials before every artist was a beginner first!
There is a moment when you are ready with your glamorous dress, high heels, not so perfect messy bun, and now it’s time to pull off your look with a cozy yet elegant eye make up look. Many questions run across like what shade to choose, what type of eyeshadow will go with the outfit, basic or shimmery look, etc.? Despite the fact the makeup enhances the beauty but it also gives a different and superior look. Everyone wants a face that naturally glows, and a lot of that radiance has to do with your eyes.
Eye makeup have been dynamic and changed with the period of time. In the beginning, kohl was enough for an eye makeup look following with an eyeliner and mascara after sometime.
As everyone is evolving with new trends, we will be providing few basic yet charming eye shadow make up looks which will turn your profile to another level. Before this, we want to share few tips for applying eyeshadow which is going to help you in creating any eye makeup tutorials or eyeshadow look much easier.
Disclaimer: This post contains affiliate links. If you click and purchase, we may receive a small commission at no extra cost to you. We only recommend tools which we have personally vetted.
Tips and Tricks for applying eyeshadow for beginners
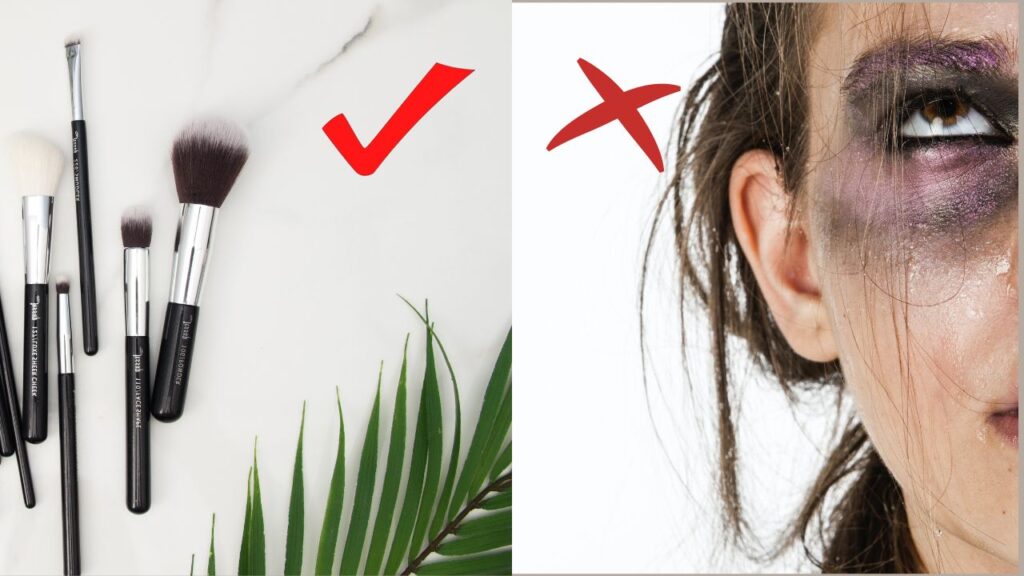
Invest in good quality brushes
Investing in quality brushes is important because brushes play the most important role in creating a beautiful and easy eyeshadow look. There are actually different types of brushes which you need to choose wisely while applying eye shadow to your eyes. The number of brushes in this industry is huge high. Still, we we have found few brushes for you which is beneficial for you as a beginner. Few brushes include:
- Blending brush
- Contour brush
- Winged eyeliner brush
- Angled Eyebrow brush
- Crease line brush
- Pencil brush
Blend-Blend-Blend
Blending is the key. It takes time but as soon as you get perfect in blending, it will be a cup of tea to make beautiful looks using our tools and skills. Do not over blend as it may mix the eye shadow shades which could may your look odd.
Shade as Light to Dark
Start with a lighter shade on the lid, then as per the look you are creating, go with darker shades. As a beginner, go for natural shades or lighter ones. Because, darker shades can mess up whole look.
But first, Prime!
Prime your eyes before using any brush so that you can easily get a neat eye makeup look. Primer acts as a barrier between the oil on your eyes and your eye makeup. It will be easy for you to blend that eye shadow and create a versatile look.
Don’t forget your brows
While applying eyeshadow, don’t forget to shape your brows which is an extremely important step. Your face gets a bolder look when your brows are clean and well- shaped. You can use a brow brush so that you could get a perfect brow shape.
Apply eyeliner after using eyeshadow
Never apply your eyeliner before applying eyeshadow as it is going to ruin your whole eye makeup look since the start. Use black products at the end of makeup look.
Use finger as an application tool
Finger application can be done if you want a basic eyeshadow look with a neutral single shade and a simple winged eyeliner.
Now, as if you are ready with your brushes and eyeshadow palette, let’s check for some eye makeup which is going to flaunt your beauty. Quickly choosing an eyeshadow look is bit difficult, however, for sparkling all night long, go for a decent eye makeup look which suits your outfit.
Different Types of Eye Makeup Tutorials / Looks and Our Favorite Picks
Everyday chic
Every girl on their casual Saturdays or college days wants to have a flattering look enhancing their key areas. This chic eye makeup tutorials is one of best tutorial which gives natural yet classy eye makeup look.
1. Prep your eyes and conceal
For getting a natural and everyday chic look, prep your eyes using a good quality primer. Primer is used to create a smooth surface which is necessary to make your makeup last long without any blemishes or fine lines. After that, concealing is the key step as It controls the puffiness of the eyes which gives a glamorous eye makeup look.
2. Define your brows
Invest in a good brow pencil so that brows are finely defined which will make your eye makeup look more precise.
3. Start with outer corners
Choose a deeper eyeshadow for outer corner area. Blend it till the middle of crease area. Take a lighter shade, then, blend on the lid. Don’t mix the shades.
4. Outline
Take an eye liner and outliner your eyes till outer corner and a bit outline at the lower lash line will be an advantage.
Here, we finish the best natural makeup ever. Pair it with not so voluminous fake lashes and nude lips.
Smokey look
Next, comes with the favorite easy party eye makeup tutorials look making you a bold avatar of all time. For some, Smokey eye look is bit difficult to create, as more of darker shades are used for it. We will be giving you basic steps of getting an easy smokey look. You are not alone who is searching how to do a smoky eye on google, so sit back and try this tutorial for a perfect smokey eye look.
1. Start priming your eyes
Priming your eyes is basic step in every tutorial to get a clean and neat eye makeup look.
2. Choose the basic eye shadow
With a blending brush, apply a base eyeshadow color on the lid. Bend the shade with the eyebrow shape.
3. Turn of mid color eye shadow
Take an angled brush and apply a little darker or mid color eye shadow to the lower lash line up to the middle of the crease looping at outer corner.
Dark shading is bit difficult
To the outer corner over the mid color eyeshadow, apply a bit of darker shade with the angled brush. After that, with soft brush, just blend out the all three shades until it is no longer precise.
4. Eyeliner and Mascara
Apply eyeliner to the lower lash line and mascara to your eyelashes. Brush off the excess powder dropped off on the face using a loose powder. A beautiful and elegant smokey look is completed.
Natural x Nude
Women these days are getting infatuated to eye makeup looks instead of those early times look with bold red lips and darker eyes. A nude eye makeup will always look better if a full face nude makeup is being done. A pair of nude eye look and nude lips is such a boon of makeup artists.
1. Prime-Conceal-Brow
You have easily learnt about prepping your eyes with primer, concealing it so get a smooth surface to work on. Try using a concealing brush to conceal your eyes. Define your brows using brow pencil and brush.
2. Basic shade
Start your nude eye makeup with a basic eye shadow on your lid. The color of basic shade should be almost same as your skin tone color. Begin blending the shade using a flat brush.
3. Shade the crease
Take a darker nude shade from the palette. Use a blending brush and start blending it from outer crease. Do not blend it on the lid. As soon as the blending is done. Using same shade, blend on inner lid up to the middle. Take your eyeliner and make a cute winged eyeliner using eyeliner pencil. For more details, you may add fake eyelashes and Pair it with nude lipstick. Voila, the natural yet nude eye makeup is done.
Hooded eye look
Hooded eye makeup look is trending these days. Giving a elongated look to the hooded eyes totally changes the way how the eyes actually looks. Basically what is a hooded eye? A shape is considered to be hooded when the upper lid is dropping on natural crease, making it difficult for crease to be visible, that is called hooded eye. Let’s just quickly look at the steps of getting eye makeup tutorials look for older, hooded eyes.
1. Priming is most important step for hooded eye makeup look
The foremost step for a hooded eye makeup is to prime the eyelids to keep the makeup stay all day long.
2. Neutral eye shadow base on lid
Take a natural eye shadow color i.e. a shade lighter than your skin tone and apply it on the whole lid.
3. Illusion of deeper socket
Use a darker shade on the outer crease area and blend it in a way that it converts into a vertical V shape. This should open up your eyes giving an illusion of deeper socket. In the inner corner, apply a light amount of highlighter to give a glowing effect.
4. Use eyeliner pencil/ black eyeshadow instead of liquid liner
Avoid using liquid eyeliner as it may look bolder and can cover whole lid making your eye look smaller. Ta-Da! Your hooded eye makeup is done.
Crystal Makeup
Crystal makeup is one of the most iconic and biggest trends of all time eye makeup tutorials. Celebrities like Kamala Harris, Dua Lipa, who are being in love in crystal looks. Not only Kamala, In Amanda Gorman and Ella Emhoff‘s makeup, crystals were everywhere. Let’s just talk about our favorite crystal embellished look of the year with this tutorial. You might be wondering about how to place crystals on eyes and where to apply them? Don’t worry we are here to answer all your questions.
1. Gather all items
The first step is to gather all required tools for this eye makeup. Of course your makeup items with an adhesive, crystals and pair of tweezers. Let’s make it more easy for beginners. They can buy the crystals or jewel having adhesive already on them.
2. Follow basic steps
Start priming, concealing your eyes. Use basic neutral shade for lid area. Using the blending brush, Apply a darker shade on the cut crease. Since you are done with blending part, take a lighter shade and using a flat brush or fingers, apply the shade on the whole lid. Blend- Blend –Blend. Apply a bit of neutral shade on lower lash line as well to give a deeper look.
3. Crystals turn
Gather small size crystal one by one and start applying likewise in given image. You may also apply the crystals on your lower lash line, upper lash line, outer crease and inner corner. Explore this trend in every possible way you can imagine and After you’re done, remove the crystals with makeup remover and apply a face moisturizer to cleanse your glowing face.
Bold and Big
Bold with nude, one of the best and our personal favorite combo of all time. We are here with a tutorial of bluish bold eye shadow as blue eye shadow is a powerful statement in makeup industry of 80s which is giving a comeback. This shade can never be considered tacky and gives a royal and versatile look.
1. Create a neutral base
Starting with prepping your eyes, choose a shade bit lighter than your skin tone shade and blend it on the lid. On the crease area, apply a bit darker nude tone eye shadow and base makeup will be done.
2. Get royal eyeshadow palette along
As soon as base makeup is done, using a flat brush, apply royal blue/or any color eye shadow according to your outfit, apply it on the lid area up to brow bone.
3. Complete it with a bit of shimmer
After blending the royal blue eye shadow, apply a bit of blue shimmer on the inner corner of the eyelid area. In the lower lash line, apply a bit of brow eye shadow and fake lashes will make the look fabulous.
Play with colors
Double eye shadow is one of the eye makeup trends ruling the industry. If you want to try something different, go with this look. Cat eye looks best with this eye makeup look. Let’s get an idea how to do it.
1. Prep your eyes
Complete your base makeup with concealer and primer. Apply a base shade using flat brush on the lid.
2. Choose first color
Take a lighter shade such as pink or yellow and apply to your lid area.
3. Second color should give compliment to first one
Since you are done with blending the color, take another color shade and apply on the outer lid giving a V shape. Do not mix the shades, Let all the shades stay at their own place. On the lower lash line, apply some amount of same eye shadow.
4. Highlighting
End up by highlighting the inner corner of the eyes and brow bone.
Night out Glam
It’s your date night or friend’s wedding or a birthday party & you are ready to flaunt that outfit. Your makeup will be going to compliment to your outfit. Yes, it’s time for a soft glam makeup with a bit of glitter, nude tones and neutral lips. Keep scrolling for this amazing soft glam eye makeup tutorial.
1. Say Yes to neutral tones at first
Start with priming your eyes, concealing it using concealer brush. On the lid, apply the neutral base color matching to your skin tone.
2. Cut crease
On the crease eye area, apply a bit darker tone from outer corner area. Blend it until it is totally giving a cut crease look. Apply some amount at the lower lash line so the lower part of eye doesn’t look odd.
3. Glitter shading
Take your glitter eye shadow, either use a flat brush or fingers to apply the glitter on the lid area. Do not cover the outer corner eye shadow. Apply a winged eyeliner and false eye lashes to complete the look.
Flaunting Freckles
Makeup with freckles can be bit confusing, however, we would be suggesting not to cover up your freckles and flaunt your skin with flaws. The eye makeup with freckles is going to be the easiest job but you need to choose the shades wisely according to your skin tone.
1. Prep your eyes and Use natural shade
With the concealer, smoothen the surface for eye makeup and using blending brush, apply a natural shade for natural makeup looks over to the lid. Pair it up the darker shade over to the outer corner area and blend it properly till the lower lash line.
2. Basic eyeliner or Graphic eyeliner
Don’t get confused because this freckles makeup will only flaunt when eye liner twist takes place. You can apply simple eyeliner for casual day out but for a dramatic look, apply graphic eye liner and it is going to rock the whole look.
Dramatic eye makeup
It’s time to go to another level of eye makeup tutorials. Dramatic eye makeup is quite trending these days. Divas are rocking their makeup skills and one should always highlight their eyes. An intense dramatic look or a simple dramatic look, both looks are going to stun the audience.
- Dramatic eye look may look easy but you need to choose your color of shade wisely. Take a shading brush and start applying the eye shadow matching with the graphic eye liner technique. You need to apply same shade to the lower lash line as well. As soon as you are done with eye shadow, just take an eyeliner pencil and start applying the liner from inner corner with compliment to eye shadow. Add a coat of mascara with voluminous false lashes.
Do’s and Don’ts
For a beginner, one needs to know what is right and wrong while doing eye makeup tutorials. It is not obvious that what you are using or doing is in the right way. When you are done deciding the look of the day, take a look at these dos and don’ts once.
Do’s
- Always prime your eye lids.
- Maintain the natural tones.
- Wet your brush for shimmer shades or glitter.
- Focus on lower lash line also.
Don’ts
- Do not use dirty brushes.
- Do not over blend.
- Do not mix different eye shadow colors.
- Do not begin with dark eye shadow shade
- Do not use too much glitter.
Tools used – Our Top Picks
We are here to help you in finding few of our favorite products which are commonly used in every eye makeup. Check them out.
Conclusion
Let’s just sum it up. The most important thing while doing eye makeup tutorials is choosing what type of makeup will look perfect on you and for what occasion you are doing it. Use right shade and tool to make the best eye makeup and sparkle the whole look. We have shared you tons of exciting option to try on. No, It’s your turn to pick the favorite and make the best look ever.